When you are ready to check one or more children out from an event, click the Event Check Out button on the Children's Check In dialog. The Check Out dialog looks like this:
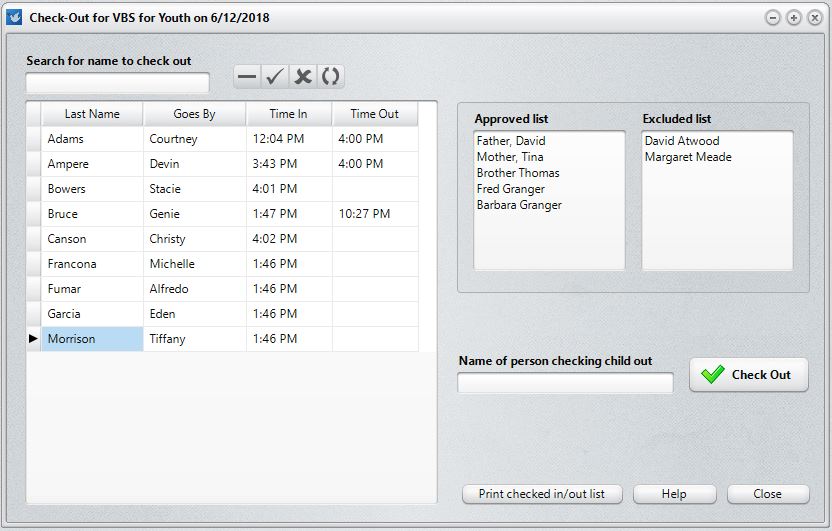
In our example above, we are getting ready to check out Tiffany Morrison. We have found her name on the list, clicked on it, and noted her Approved and Excluded list. If the person try to check her out is on the Approved list, you can either double-click that name on the Approved list, or you can type it in. If the person attempting to check out the child is on the Excluded list, you should print the Print Checked In/Out list using the button provided, find out who checked the child in, and seek their permission before you release the child to anyone on the Excluded list.
Once you have entered the name of the person checking the child out, click the Check Out button. The Time Out field will be automatically filled in with the current time.
In the Time Out column above, you'll note that a number of the Time Out fields are empty. Those denote children who are not yet checked out.
We'll say what goes without saying: if you are going to make use of this feature, make sure all children are properly checked out at the end of the event. We also recommend that you print a final copy of the Checked In/Out list and give it to the church office for filing away in a safe place so that it can be used as a reference in case there are questions in the future.