The Check-In dialog allows you to actually check in children for the event specified when you first select the Children's Check In item on the Names menu. It looks like this:
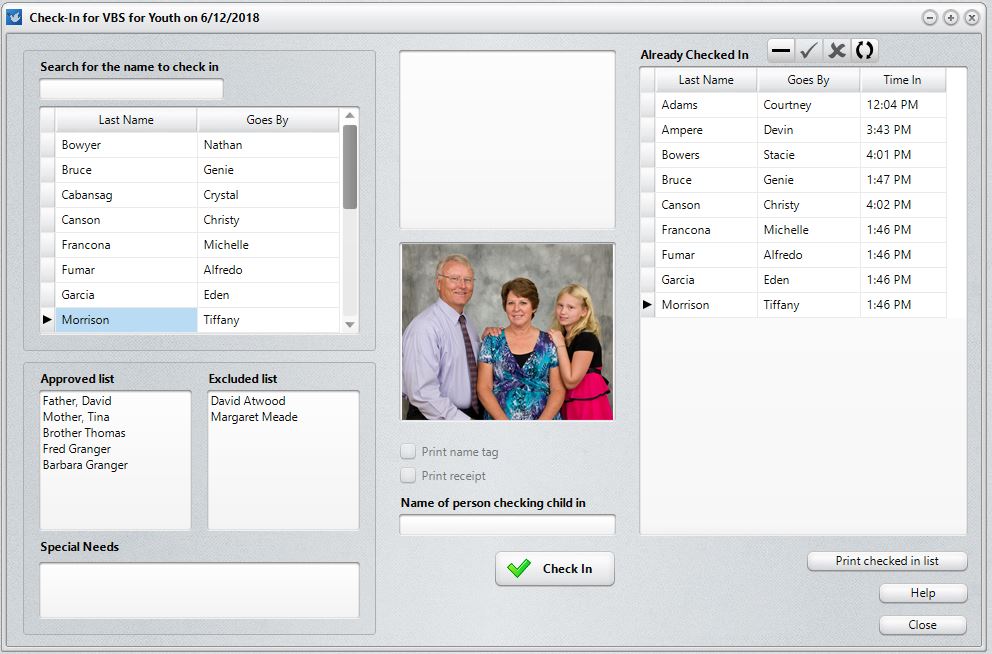
In the screen grab above, you can see the list of names on the left that is based on the information you provided on the initial Children's Check-in dialog. This narrows the list of names that you select from, making your task easier.
For each name, you can enter an Approved and an Excluded List. You can be as rigid about this as you need to be in your setting. If you know the parents and relatives and friends well, you may not need to pay as much heed to this as those situations where there are a lot of children or if you don't personally know the families involved. You can also enter any special needs that a child has. You don't need to click anything to save this info. It's saved automatically for you whenever you move to another name or check in a child.
The list on the right side of the dialog is the list of those children already checked in for the event you've defined.
In the center portion of the dialog are places for two pictures: the top one being of the child him/herself (if you have defined one), and the bottom box shows the family picture.
Checking In a Child
The process is easy and straightforward.
1.First, find the child you are checking in on the list on the left. Make sure the name is highlighted by clicking directly on the name you are checking in.
2.When the child's name is highlighted, this is the time to add any names to the Approved or Excluded list as well as special needs.
3.When you are ready to check the child in, click directly into the edit box under the family picture and type in the name of the person checking the child in. If you have names in the Approved list and one of them is checking the child in, you can double-click that name in the Approved list and it will be added to edit box for you.
4.Once the name of the person checking the child in is filled in, you can click the Check In button. The child's name will be immediately added to the checked in list along with time, as well as the attendant who checked him/her in. The attendant's name is drawn from their CMD login credentials.
You may also click the Print Checked In List button at any time to print the list of names currently checked in.